How to Restore a 1967 Ford Mustang Engine
Restoring a 1967 Ford Mustang engine, particularly the iconic 289 cubic inch small-block V8, is a project that appeals to many classic car enthusiasts. This engine, known for its balance of power and reliability, requires careful planning and methodical execution. The process of rebuilding such an engine involves multiple stages, from initial disassembly to final assembly, and understanding the sequence of operations can help ensure a consistent outcome. While each engine has its own history and condition, a structured approach provides a framework for evaluating components and making informed decisions. The following sections outline a general methodology for approaching a 289 V8 rebuild, highlighting critical specifications and areas where attention to detail is particularly important.
Before beginning any work, it is essential to establish a clean and organized workspace. Documenting the original configuration through photographs and notes can be helpful when ordering replacement parts. A complete set of factory service manuals or a reputable aftermarket guide for the 1967 Mustang 289 engine serves as a reference for torque values, clearances, and assembly sequences. This preparation phase also involves acquiring the necessary tools, including a torque wrench capable of reading in foot-pounds, a dial indicator for measuring end play, micrometers for checking bore and journal dimensions, and a ridge reamer for removing cylinder wear ridges. The time invested in preparation often reduces the likelihood of interruptions during assembly.
Understanding the 289 V8 Engine
The 289 cubic inch V8 was introduced by Ford in 1963 and became a mainstay in the Mustang lineup from 1964 onward. For the 1967 model year, the engine was offered in multiple states of tune, with two-barrel and four-barrel carburetor versions producing 200 and 271 horsepower respectively. The engine shares its basic architecture with other Ford small-blocks of the era, featuring a cast-iron block and cylinder heads, a forged steel crankshaft in most applications, and a timing chain-driven camshaft. Understanding the differences between these variants is important when ordering replacement parts, as internal components such as pistons, connecting rods, and camshaft profiles may vary.
A key characteristic of the 289 engine is its relatively compact bore and stroke dimensions: a 4.00-inch bore and a 2.87-inch stroke. This geometry contributes to the engine’s ability to rev freely, but it also means that cylinder wall wear can progress more quickly if maintenance has been neglected. The engine lubrication system uses a full-pressure oil circuit with a gear-type oil pump mounted on the rear main bearing cap. Oil passages in the block direct lubrication to the main bearings, rod bearings, and camshaft journals. When rebuilding, attention to oil passage cleanliness and proper oil pump clearance is essential to maintain consistent oil pressure.
Disassembly and Inspection
The first step in the physical restoration is removing the engine from the vehicle. While the 289 can be rebuilt in the car under certain conditions, a full disassembly typically requires pulling the engine to access all components. Once the engine is on a stand, the external accessories such as the intake manifold, exhaust manifolds, water pump, and distributor are removed. The cylinder heads are then unbolted, and each fastener should be loosened in a crisscross pattern to avoid warping the head. After removing the heads, the valves, springs, and retainers can be taken out using a valve spring compressor.
Turning the engine over, the oil pan and oil pump are removed, followed by the connecting rod caps and main bearing caps. Marking each cap and its orientation is a standard practice to ensure correct reinstallation. The crankshaft and camshaft are then extracted, and all components should be organized for cleaning and measurement. At this stage, thorough cleaning of the block is necessary to remove sludge and carbon deposits. After cleaning, inspection involves measuring cylinder bores for wear and taper using a bore gauge, checking the crankshaft journals for out-of-round conditions, and verifying the camshaft lobe lift. If the block or crankshaft exhibits excessive wear, machining operations such as cylinder boring or crankshaft grinding may be required. It is advisable to consult a professional machine shop for these tasks, as precision tolerances are critical for long-term engine function.
Parts Selection and Preparation
Choosing replacement parts for a 289 V8 restoration depends on the intended use of the vehicle. For a standard rebuild that maintains factory specifications, OEM-style pistons, rings, bearings, and gaskets are widely available. Many suppliers offer complete engine rebuild kits that include these components as a matched set. When selecting a gasket set, note that the 1967 engine uses a specific intake manifold gasket configuration and a composite head gasket that accommodates the surface finish of the block. For the timing set, a chain and sprocket set with a steel-backed cam sprocket is typically recommended over the original nylon-tooth design.
Cylinder head preparation is a significant part of the rebuild. The original cast-iron heads can be reconditioned by installing new valve guides, seats, and stem seals. Many restorers choose to have the heads surfaced to ensure flatness, especially if the engine had a blown head gasket. Valve spring pressure should be checked against factory specifications, and springs that have lost tension should be replaced. For the valve train, pushrods and rocker arms should be inspected for wear at the ball ends and fulcrum. While some owners opt for aftermarket roller rockers, the factory stamped steel rocker arms function reliably when adjusted correctly. The oil pump, often overlooked, should be replaced with a new unit that meets the original pressure specifications, as a worn pump can lead to inadequate lubrication.
Reassembly Steps with Torque Specifications
Once all components have been cleaned, measured, and machined as needed, reassembly begins with the short block. The camshaft is installed first, with generous application of assembly lube on the cam journals and lobes. The timing set is then positioned, ensuring the camshaft and crankshaft sprocket timing marks are aligned according to the service manual. The crankshaft thrust bearing clearance should be checked with a dial indicator; typical specifications call for 0.004 to 0.008 inches. Main bearing caps are torqued in two or three stages, with a final torque of 60 to 70 foot-pounds for the 289, depending on the bolt type. Connecting rod nuts are torqued to 19 to 24 foot-pounds after checking rod side clearance.
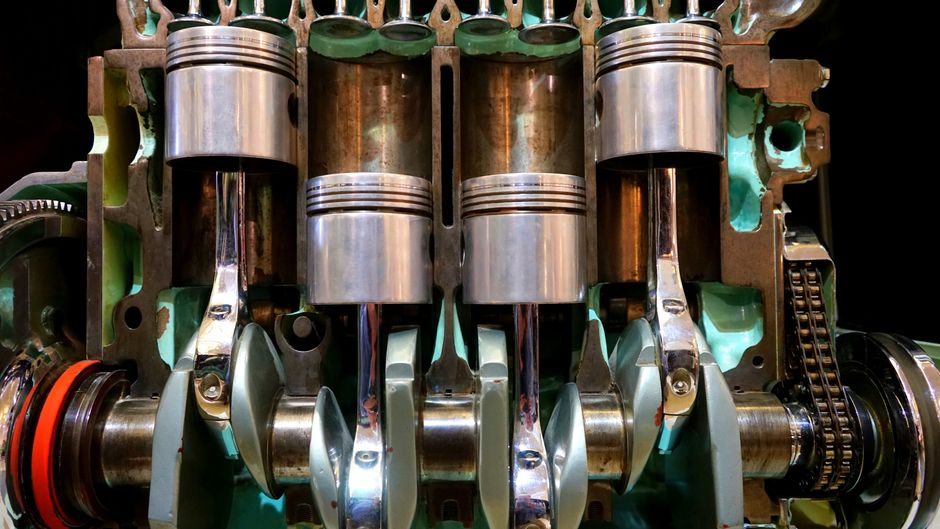
Piston installation requires careful attention to ring gap orientation and rod bearing clearance. After fitting the rings onto the pistons, the gaps should be measured in the cylinder bore; typical ring end gaps for a stock 289 are 0.010 to 0.020 inches for the top ring and 0.010 to 0.025 inches for the second ring. Pistons are installed with the notch or arrow pointing toward the front of the engine. The cylinder heads are then secured using head bolts in a specific sequence, starting from the center and working outward. Head bolt torque for the 289 is generally 65 to 72 foot-pounds in two steps. After installing the heads, the intake manifold is positioned with a thin bead of sealant at the block-to-intake gasket junctions. Torque for the intake manifold bolts is typically 23 to 25 foot-pounds. The rocker arms and pushrods are adjusted to the factory lash setting: zero lash plus a half-turn for hydraulic lifters, or specific hot lash for solid lifters if used.
Common Pitfalls and Considerations
Several areas commonly cause issues during a 289 V8 rebuild. One is the alignment of the oil pump driveshaft with the distributor gear. If the pump is not correctly indexed, the oil pump may bind or the distributor may not seat fully. A simple method is to install the oil pump and intermediate shaft, then rotate the engine to verify that the shaft turns freely before mounting the distributor. Another frequent oversight is the condition of the harmonic balancer rubber ring. A deteriorated balancer can lose its damping ability, leading to crankshaft torsional vibration over time. Replacing the balancer with a new unit that matches the original inertia is advisable.
Cooling system components should also be inspected. The 289 engine uses a water pump with a specific impeller design, and aftermarket replacements may not always match the original flow characteristics. Checking the thermostat opening temperature and ensuring the radiator is clean can prevent overheating after startup. Finally, when starting the rebuilt engine for the first time, a pre-oiling procedure using a drill-driven oil pump primer helps establish oil pressure before the engine fires. This step reduces the risk of bearing damage during initial cranking. After startup, a series of warm-up cycles with periodic retorquing of the cylinder head bolts and intake manifold bolts is recommended, as gaskets may compress slightly. Following these guidelines provides a systematic foundation for restoring a 1967 Ford Mustang 289 V8 engine, though individual results may vary depending on the condition of each component and the quality of machine work performed.